
Frugal Kiddie Craft DIY Scented Paper Plate Pie
Cut small strips out of the brown construction paper. Let your child glue it over the edges of the plate. This is the top crust of the "pie". Use scissors to cut off the excess of the brown paper around the edge of the plate. Finish off by gluing a couple cotton balls to the middle of the top as the "whipped cream"!
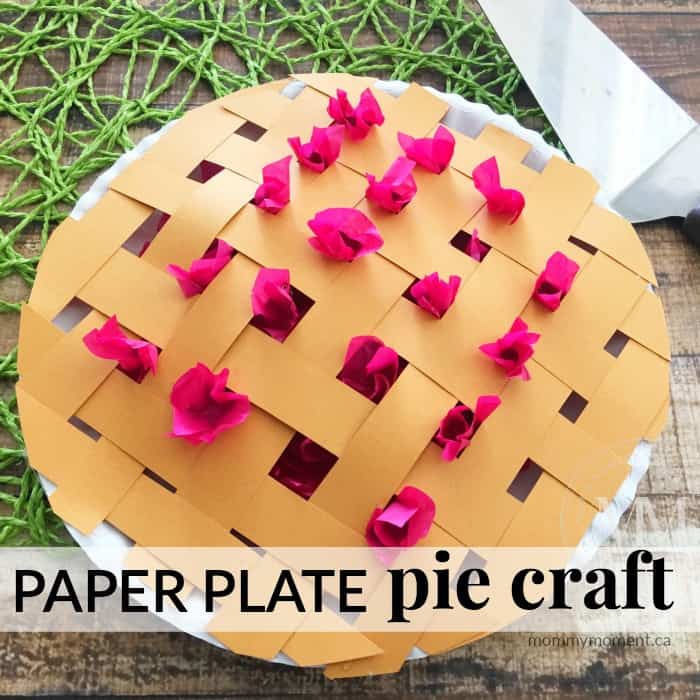
PAPER PLATE PIE CRAFT FOR KIDS Mommy Moment
First cut your paper plate to resemble a pie slice. Now have children paint the entire piece completely orange. Set aside. While they are working on that, cut some small squares out of your brown cardstock. This will be the "crust" of the piece. Once your child is done completely covering the paper plate, staple the brown squares along the.

Little Jack Horner Paper Plate Pie Craft
Bottle Cap Pies. 15. Apple Pie Sensory Bin. 1. Paper Plate Apple Pie. Apple pies are among the most popular pies out there and this paper plate apple pie from Just Add Speech is a treat to make! It's surprisingly easy and looks like a real pie, complete with lattice on the top! 2. Pumpkin Pie Slice Craft.

Paper Plate Pumpkin Pies The Crafty Teacher
Step 2: CREATE THE PIE. Print the pie fillings templates. There is pumpkin, cherry, berry, and apple fillings to choose from, but you will only need to select 3 flavors. Pick your favorites and cut out the circles. Use a glue stick to attach a pie filling to the center of each dried plate.
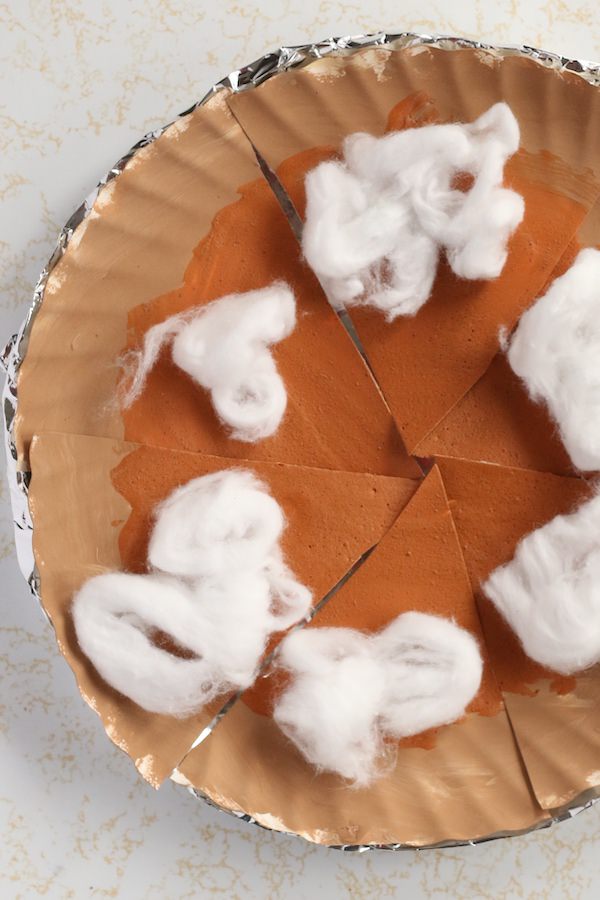
Paper Plate Pumpkin Pie Craft with Cotton Balls — JINZZY
I had the paper plates out to make my Football Fan, so I went ahead and turned a pair of plates into a cherry lattice pie.As one does. If you prefer a blueberry pie, switch out the red paint and red pom-poms for blue. By the way, you can add scent to this project if you really want to go all in. Use the same technique as I did for my scented pumpkin pie craft, but swap out the cinnamon oil for.

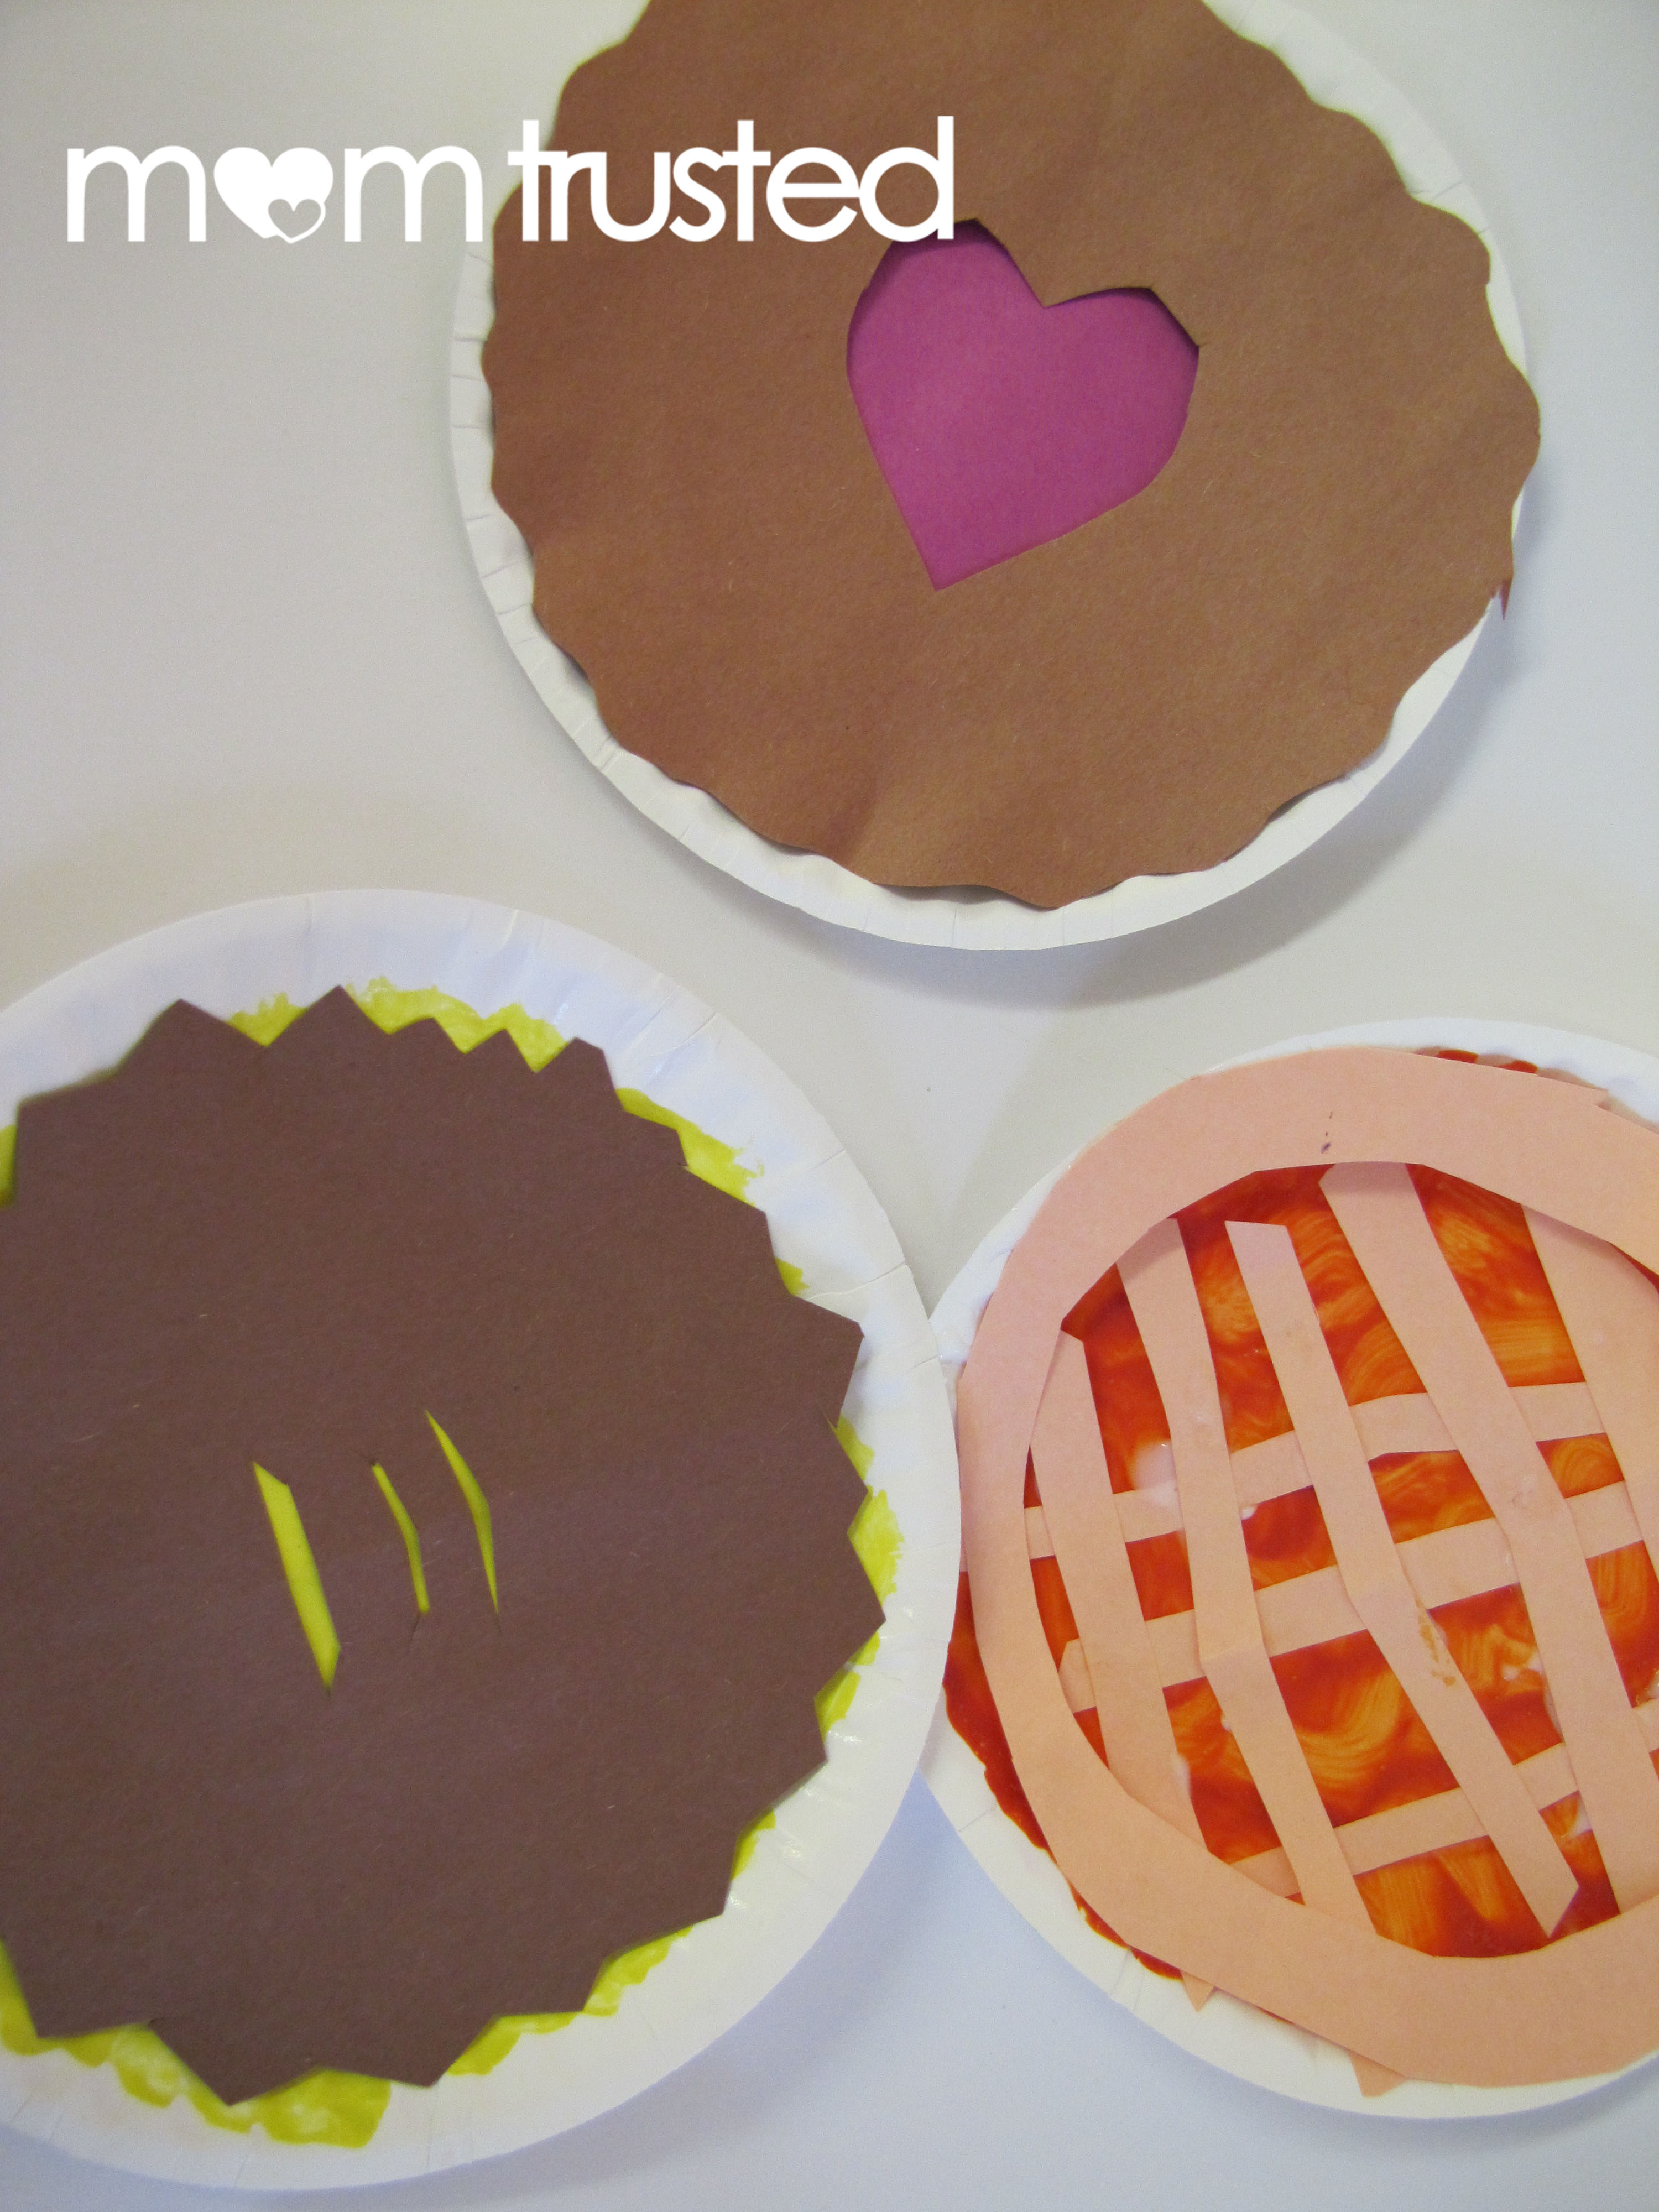
Children’s Foundation of America » Blog Archive National "Pi" Day Paper
1. Start off by painting the inside of your paper plate with orange paint and the outside rim in your light brown paint color. Let dry. 2. Once your plate is dry cut your paper plate in half. Cut the two half circles in half again to create pie slices. 3. Add cotton balls or white pom poms, as the whipped cream topping, towards the edge of the.

Paper Plate Pie Craft Project for Kids Woo! Jr. Kids Activities
Directions: First cut your paper plate to resemble a pie slice. Think of a pizza slice shape. Discard the excess paper plate pieces. Now paint the paper plate piece slice completely tan with the craft paint. When done, and while the paint is still wet, go ahead and sprinkle some orange "cinnamon" on top. Set it aside.
Paper Plate Craft Thanksgiving Pies Preschool Activities and Printables
Paper Plate Pies Craft Supplies Needed. Paper plates; Acrylic paint - brown, tan, red, orange; Brown cardstock; Cotton balls; Scissors; Glue stick; Thanksgiving Pie Craft Step by Step Directions. You will need 3 paper plates for each pie craft. Start by painting the paper plates.
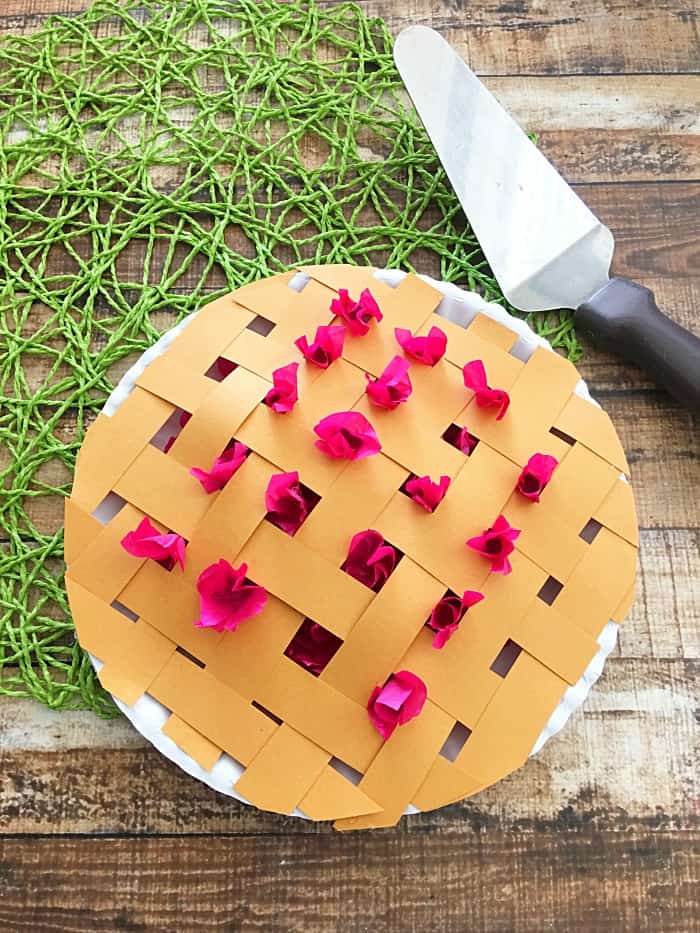
PAPER PLATE PIE CRAFT FOR KIDS Mommy Moment
It's easy to adapt this project to make a blueberry pie or to feature other fruit. Get the instructions for --> Paper Plate Lattice Pie Filed Under: Paper plate crafts , Preschool , Preteen , School Age Crafts & Activities for Kids , Teenagers Tagged With: cherry , paint , Paper Plate Crafts , pie , pom pom

PAPER PLATE PIE CRAFT FOR KIDS Mommy Moment
Organize an art and craft party for your friends and set up different stations. Because our easy paper plate crafts are fun for kids of all ages, they make for a perfect party activity. Set out some plates, scissors, markers, construction paper, and glue sticks. Or get more advanced with pipe cleaners, pom poms, cotton balls, scraps of felt.

Thanksgiving Arts & Crafts for Little Ones
How-To: Paint the outer rim of the paper plate with the brown paint. Mix equal amounts of shaving cream and white glue in a small bowl until combined and fluffy. Add a generous squirt of the rust coloured paint and stir in well with a paint brush. Paint the center of the pumpkin pie with the puffy paint and allow to dry.

Paper Plate Pie Craft Project for Kids Woo! Jr. Kids Activities
How to Make a Paper Plate Pumpkin Pie: First cut your orange tissue paper into squares. Next cut your paper plate to resemble a pie slice. Now put a good layer of glue all over the paper plate piece. Have your child cover the piece completely with the cut up tissue paper. While they are working on that, cut some squares out of your brown cardstock.
PAPER PLATE PIE CRAFT FOR KIDS Mommy Moment
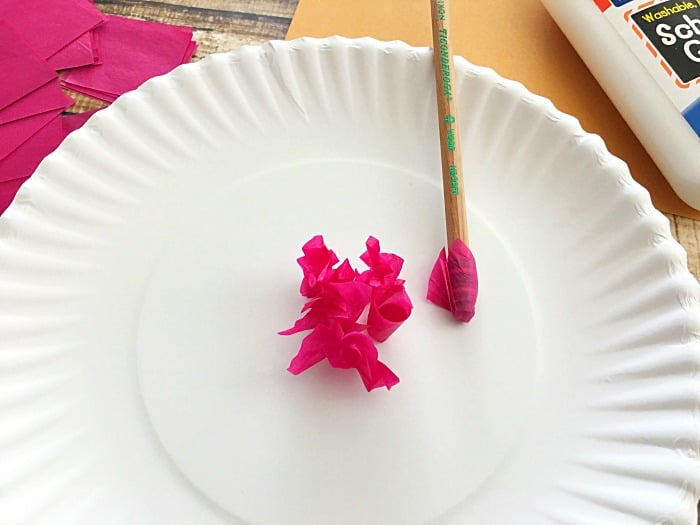
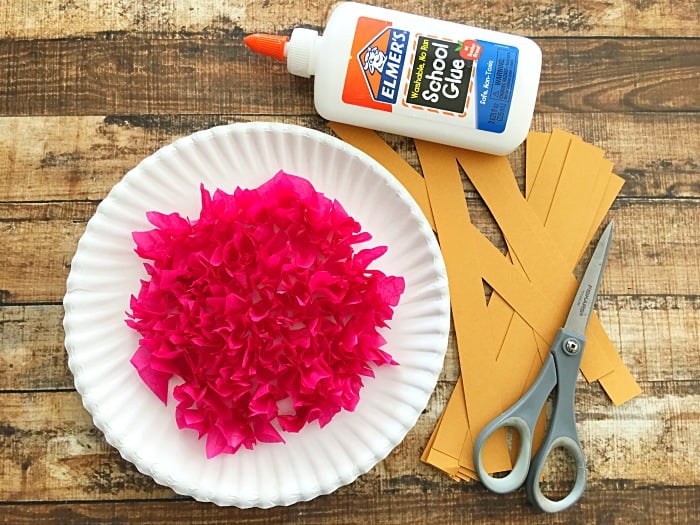
1. Cut your light brown paper into about 12 strips, a little under 1″ wide. 2. Now wrap your pink tissue paper squares around the eraser of your pencil. 3. Dip the wrapped paper into your Elmer's glue then press the paper onto your paper plate. 4. Fill up the inside circle of your paper plate repeating step 3. 5.
PAPER PLATE PIE CRAFT FOR KIDS Mommy Moment
Assorted Construction Paper (Pie Crust, Filling, Toppings) Paper Plates (Pie Tins) Stapler; Pen; Scissors . Your Work Space: Make sure to have ample space to spread out your craft supplies. For our paper pies we chose to include paper that would match the color of popular pie fillings and beige paper for the pie crust. Remember to make this.

Paper Plate Pie Craft Project for Kids Woo! Jr. Kids Activities
Cut the paper plate across, from top to bottom, then from side to side, dividing the paper plate into four equal parts. In pie terms: start with the whole pie & cut it into four pieces ;) Cut four vertical slits in each individual piece of pie. The slits will sit in the middle of each piece, not connecting to either the top or the bottom.

Paper Plate Pie Craft Project for Kids Woo! Jr. Kids Activities
Cut 8 strips of cream colored construction paper using fun shaped scissors. Weave the strips alternating top to bottom. Using a glue stick, add glue in between the top layer of the lattice's outside edge. Flip over and repeat. Add glue around the plate's edge, placing the lattice on top.
